The appeal of landscaping with daylilies extends far beyond their gorgeous trumpet-shaped blooms. These workhorses of the perennial border tolerate heat, drought, and various soil conditions while providing months of continuous interest.
From compact dwarf varieties perfect for edging to towering statement plants for back borders, there’s a daylily for every landscape need.
This comprehensive guide walks you through every step of creating daylily flower beds – from selecting the varieties and designing layouts to planting techniques and long-term maintenance. By the end, you’ll have the knowledge and confidence to transform your yard with these exceptional flowering perennials.
What are daylilies?
Daylilies (Hemerocallis) offer remarkable diversity to suit any daylilies garden design.
Understanding the different types helps you select varieties that deliver continuous color throughout the growing season.
- Early-season bloomers flower in late spring to early summer, kicking off the daylily display. Varieties like ‘Happy Returns’ and ‘Stella de Oro’ fall into this category, with the latter being a reblooming type that produces flowers multiple times per season.
- Midseason varieties bloom during the heart of summer (July in most US zones). Popular choices include ‘Hyperion’ with its fragrant yellow blooms and ‘Pardon Me’ with deep red flowers.
- Reblooming daylilies are prized for their extended flowering period, often blooming twice or even three times from spring through fall. These varieties maximize your investment in daylily landscape uses.
Height variation offers additional design flexibility. Dwarf daylilies (12 – 18 inches tall) work beautifully as border edging, while standard varieties (24 – 36 inches) fill midground spaces. Tall cultivars (36 – 48+ inches) create dramatic backdrops in flower beds with daylilies.
Planning your daylily flower beds
Successful daylilies in landscape design starts with thoughtful planning. Taking time to consider location, layout, and design principles ensures your beds look professional and thrive for years.
Choosing the right location
- Daylilies perform best in full sun, defined as 6 or more hours of direct sunlight daily. This light exposure encourages abundant blooming and sturdy growth.
- Well-draining soil is essential for daylily success. These plants dislike wet feet and may develop crown rot in consistently soggy conditions.
If your yard has heavy clay or poorly draining areas, consider building raised beds or improving soil structure with organic amendments.
Sandy or loamy soils naturally provide the drainage daylilies prefer.
Design principles
Professional-looking daylily landscaping follows design principles that create visual harmony and maximize impact.
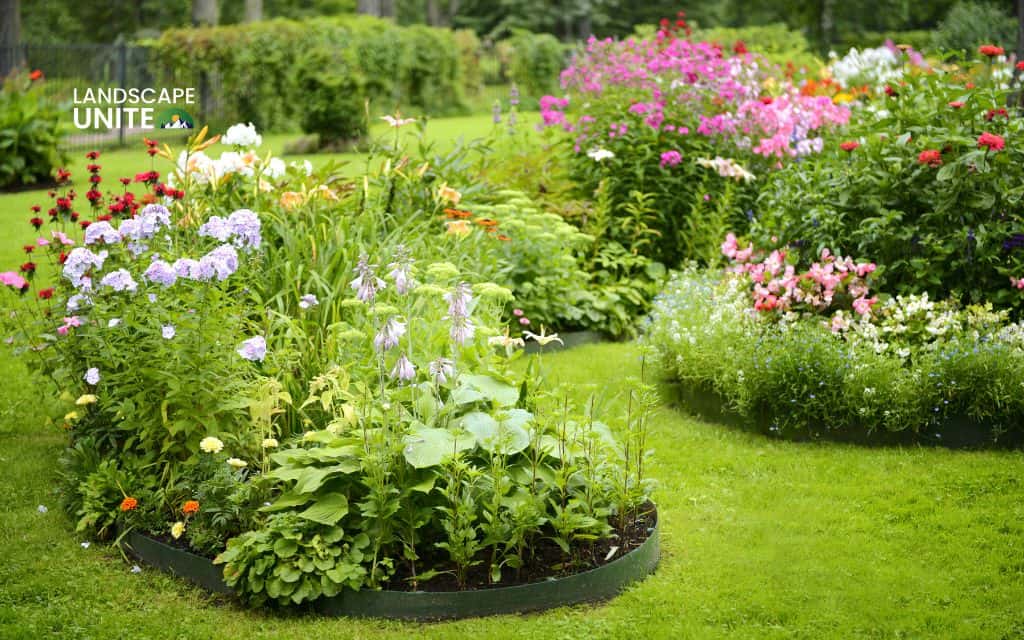
Layering by height creates depth and ensures all plants receive adequate light. Position tall varieties at the back of borders or center of island beds. Place medium-height cultivars in the midground, and reserve dwarf types for front edges where their blooms remain visible.
Bed shapes significantly influence your landscape’s character.
- Curved, flowing edges create a naturalistic, relaxed feel that complements informal garden styles.
- Straight borders along fences, foundations, or property lines offer clean lines suited to formal or contemporary landscapes.
- Island beds visible from all sides work wonderfully in lawns or as standalone features, requiring careful plant placement with taller varieties in the center graduating to shorter ones at all edges.
Repetition and rhythm strengthen cohesive design. Rather than planting single specimens of many varieties, use groups of 3, 5, or 7 of the same cultivar throughout the bed. This repetition creates visual unity while still allowing variety.
Step-by-step guide to planting daylily beds
Proper planting techniques establish healthy, vigorous daylily flower beds that deliver years of reliable blooms. Follow these steps for best results:
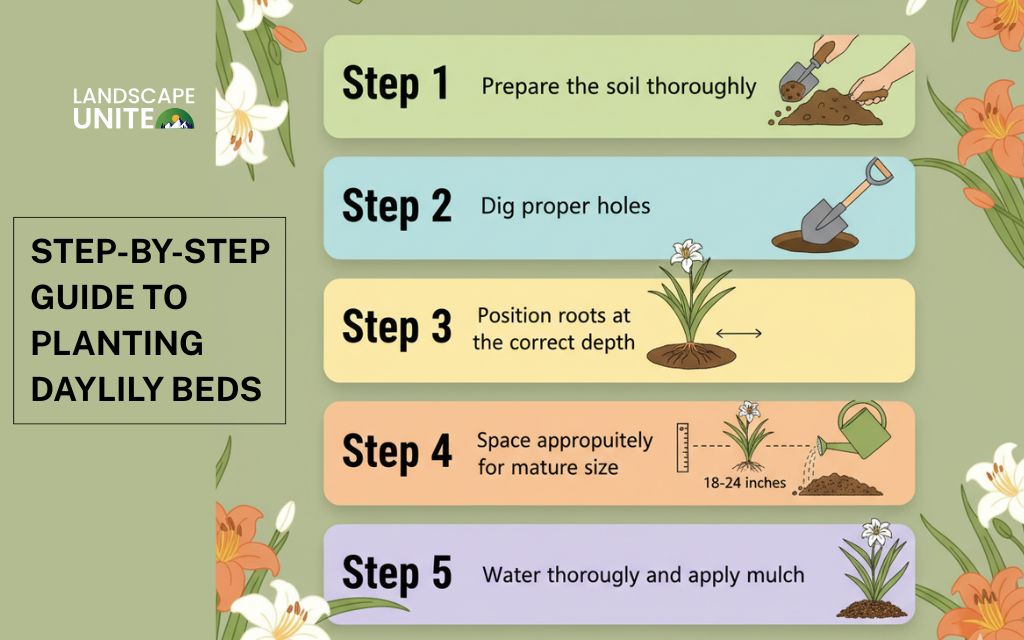
Step 1: Prepare the soil thoroughly
Begin by clearing the planting area of weeds, grass, and debris.
Spread 2-3 inches of compost or well-rotted organic matter over the bed and work it into the top 10-12 inches of existing soil.
This amendment improves drainage in clay soils and increases water retention in sandy soils while adding nutrients. For particularly challenging soils, consider incorporating additional peat moss or aged manure.
Step 2: Dig proper holes
Create planting holes slightly larger than the daylily root system – typically 10 – 12 inches wide and 8-10 inches deep.
Form a small cone of soil in the center of each hole to spread roots over. This prevents root circling and encourages outward growth.
Step 3: Position roots at the correct depth
Place each daylily so the crown (where roots meet foliage) sits approximately one inch below the soil surface.
Setting plants too deep can cause rot, while shallow planting may expose roots to temperature extremes. Spread roots naturally over the soil cone, avoiding bunching or circling.
Step 4: Space appropriately for mature size
Allow 18 – 24 inches between individual daylily plants. This spacing provides adequate airflow to reduce disease risk while giving plants room to form attractive clumps over 2 – 3 years.
For a quicker filled-in look, space at the closer end of this range, but be prepared to divide sooner. When landscaping with daylilies in mixed borders, leave additional space between daylilies and companion plants to prevent crowding.
Step 5: Water thoroughly and apply mulch
After backfilling holes with amended soil, water deeply to settle soil around roots and eliminate air pockets.
Apply 2 – 3 inches of organic mulch (shredded bark, wood chips, or pine needles) around plants, keeping mulch 1 – 2 inches away from crowns to prevent rot. Mulch conserves moisture, suppresses weeds, and moderates soil temperature.
Water regularly during the first growing season, providing approximately 1 inch of water weekly through rainfall or irrigation.
Landscaping ideas with daylilies flower beds
The versatility of daylilies in landscape design opens endless creative possibilities. These adaptable perennials excel in various garden situations, from formal to casual, large-scale to compact.
Borders & pathway edges
Lining walkways
Lining walkways with daylily flower beds creates welcoming, colorful corridors that guide visitors through your landscape.
Dwarf and compact varieties like ‘Stella de Oro’ (golden yellow), ‘Pardon Me’ (burgundy-red), or ‘Happy Returns’ (lemon yellow) work particularly well for pathway edges, staying proportionate and not overwhelming narrow spaces.
Fence line plantings
Fence line plantings transform plain barriers into living screens of color. Use taller daylily varieties along privacy fences, graduating to medium and dwarf types as you move toward lawns or paths. This layered approach softens hard boundaries while maximizing bloom visibility.
Foundation plantings
Foundation plantings benefit from daylilies’ neat growth habit and seasonal interest. Plant evergreen shrubs as backbone plants, then fill spaces between with daylilies for summer color. This combination provides year-round structure with seasonal excitement.
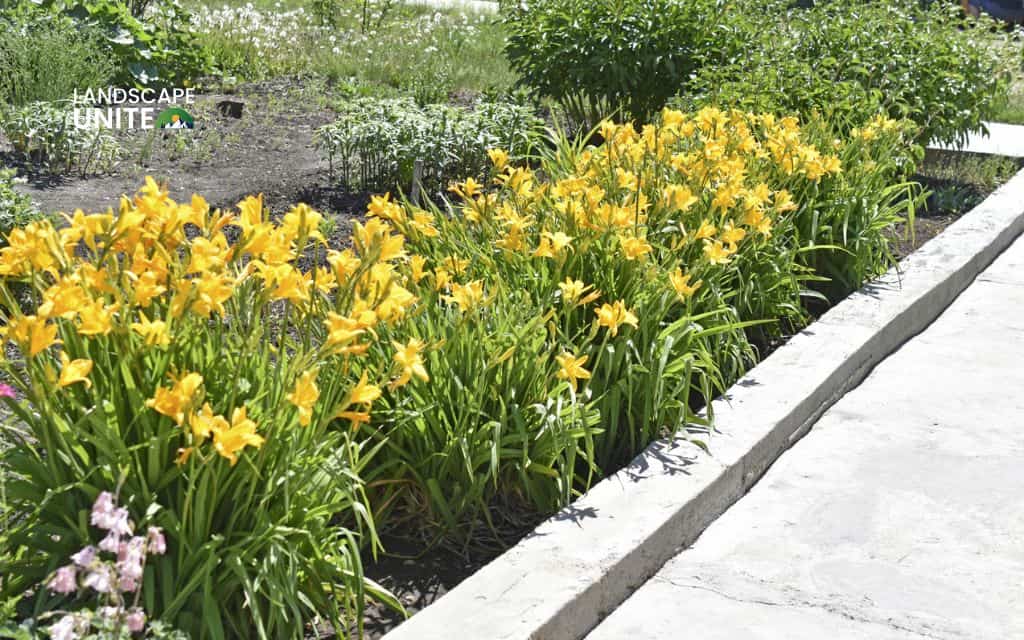
Mass plantings for dramatic effect
Bold color clusters
Plant 9-15 daylilies of the same variety in flowing drifts rather than rigid rows for a naturalistic effect. This technique works spectacularly with vibrant colors – imagine a river of orange ‘Primal Scream’ flowing through your landscape or a sunset-hued drift of peachy-pink ‘Champagne Taste.’
Monochromatic schemes
Monochromatic schemes using multiple varieties within one color family offer sophistication and coherence. A bed featuring yellow daylilies ranging from pale butter to deep gold creates a luminous effect without visual chaos.
Similarly, combining pink varieties from soft shell pink to deep rose generates romantic, harmonious displays perfect for cottage garden styles.
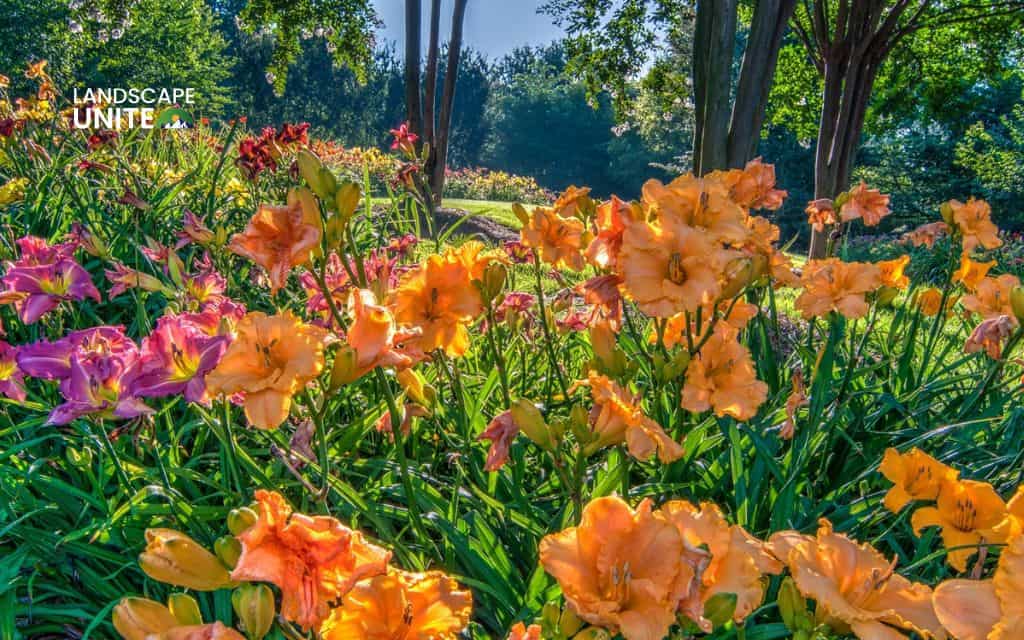
Mixed beds & slopes
Companion planting combinations
Pair daylilies with perennials that flower before, during, and after their peak season.
- Spring bulbs like daffodils and tulips provide early color, while daylily foliage emerges to hide dying bulb leaves.
- Summer companions include purple coneflowers, black-eyed Susans, and ornamental grasses. Late-season asters and sedums carry the display into fall.
Slope stabilization
This represents one of the most practical daylily landscape uses. Their fibrous root systems hold soil effectively, preventing erosion on banks and hillsides while eliminating difficult mowing situations.
For slope plantings, space daylilies 18 inches apart for quicker coverage and plant in staggered rows rather than straight lines for better stability.
Meadow-style combinations
Meadow-style combinations with ornamental grasses create movement and textural contrast. The vertical, fountain-like form of grasses complements daylilies’ bold blooms beautifully.
Try pairing daylilies with switch grass (Panicum virgatum), little bluestem (Schizachyrium scoparium), or fountain grass (Pennisetum alopecuroides).
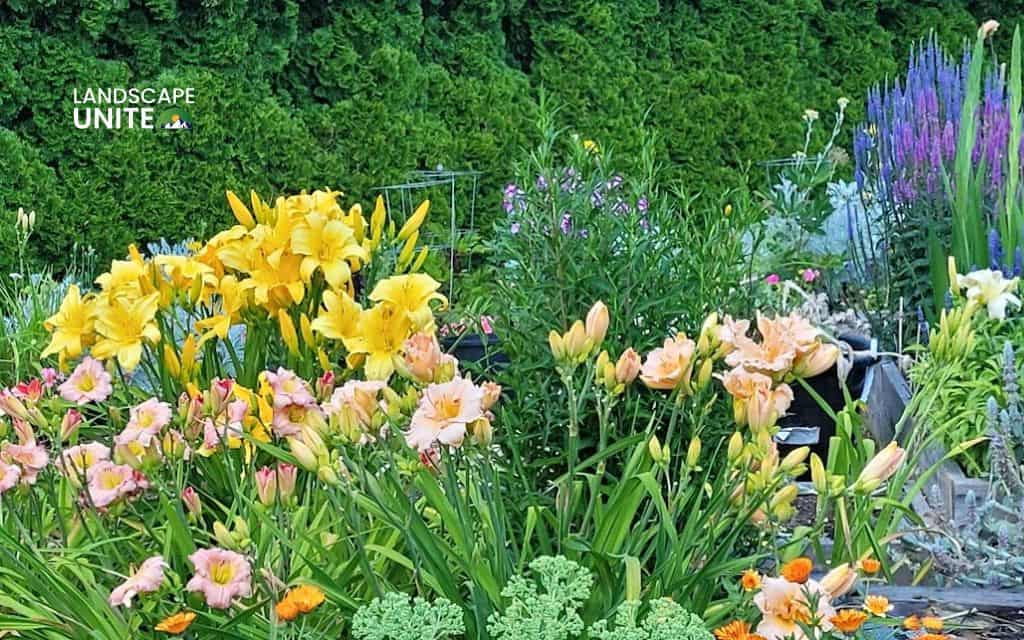
Small gardens & containers
Container combinations
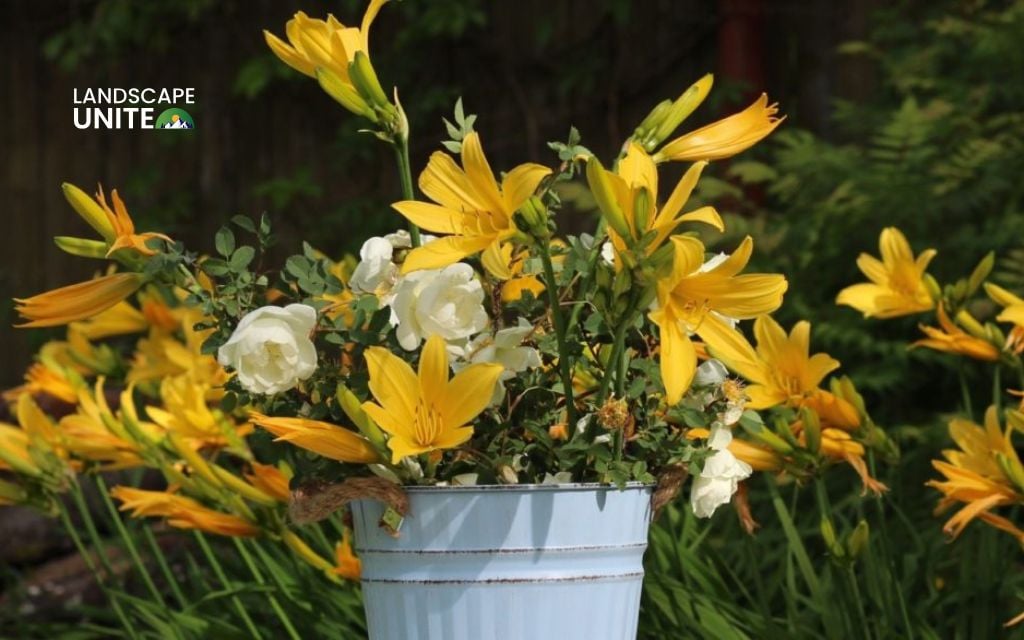
Container combinations bring daylily color to patios, decks, and balconies where ground planting isn’t possible. Choose dwarf cultivars that stay under 18 inches tall, such as ‘Mini Pearl’ or ‘Little Grapette.’ Use containers at least 12-14 inches in diameter with drainage holes to accommodate root growth.
Pair with annuals
Pair with annuals in mixed containers for extended interest. Trailing petunias or sweet potato vine spill over container edges while daylilies provide upright structure and focal interest. This combination delivers continuous color from spring through frost.
Small-space borders
Small-space borders maximize impact in compact yards. Even a narrow 2-foot-wide strip along a fence or walkway can accommodate a lovely daylily display using dwarf varieties.
Stagger plants in a zigzag pattern rather than a straight line to create depth and interest in tight quarters.
Why choose daylilies for your landscape?
Daylilies stand out among perennials for their exceptional combination of beauty, toughness, and value, making them a smart choice for any American garden.
Low-maintenance & long-lasting blooms
Daylilies require minimal care compared to other flowering perennials. Once established, they need only weekly watering during dry periods, annual spring fertilization, and division every 3-5 years. Unlike annuals requiring yearly replacement or roses demanding constant attention, daylilies thrive with basic care.
While individual flowers last one day, each stem produces multiple buds that bloom sequentially for 3 – 4 weeks. Reblooming varieties like ‘Stella de Oro’ flower multiple times from spring through fall. By selecting early, midseason, and reblooming types, you can enjoy continuous color from May through September.
Their drought tolerance once established reduces water needs and maintenance, making them excellent for water-wise landscapes.
Adaptable to many conditions
Daylilies grow successfully in clay, loam, or sandy soils with pH ranges from 6.0 – 7.5, covering most garden conditions. They’re hardy in USDA zones 3-9, performing reliably from Minnesota to Florida.
These versatile perennials work equally well in formal beds, cottage gardens, prairie meadows, or contemporary designs. Use them for borders, slopes, mass plantings, or even containers – daylilies adapt to virtually any landscape need.
Affordable & easy to find
At $8 – 15 per plant at most garden centers, daylilies offer exceptional value. Each plant multiplies into substantial clumps within 2 – 3 years, and dividing them creates free plants to expand your beds or share.
How to maintain daylily flower beds
Proper maintenance keeps daylily flower beds healthy and blooming abundantly with minimal effort.
Watering & fertilization
Water deeply once or twice weekly during active growth, providing one inch total per week through rainfall or irrigation. Deep watering encourages strong root development. After blooming ends, reduce watering frequency as plants need less moisture.
Apply balanced fertilizer (10 – 10 – 10) in early spring as new growth emerges – about 1 cup per established clump. Water thoroughly after application. Avoid over-fertilizing, which creates excessive foliage with fewer flowers.
Deadheading & dividing
Remove spent blooms daily or every few days to maintain appearance, though this isn’t essential for plant health. Cut entire flower stalks at ground level once all buds finish blooming.
Divide clumps every 3 – 5 years in spring or fall to maintain vigor. Signs division is needed include decreased flowering, overcrowded clumps, or dead centers. Dig the entire clump, separate into sections with 3 – 4 fans each, trim roots to 6 – 8 inches, and replant immediately at proper depth.
Pest & disease management
Common pests include aphids, thrips, and spider mites. Daylily leaf streak is the most serious disease, causing yellow-brown streaks on foliage.
- Remove infected leaves immediately, improve air circulation through proper spacing, and apply copper-based fungicides at first signs.
- Prevent crown rot by ensuring good drainage and planting crowns slightly above soil level rather than too deep.
Deer and rabbits occasionally browse daylilies but don’t prefer them – use deterrent sprays in areas with heavy wildlife pressure.
Conclusion
Daylily flower beds deliver exceptional beauty, resilience, and value for American gardeners. Their vibrant colors, extended bloom seasons, and minimal maintenance requirements make them ideal for both beginners and experienced enthusiasts. From dramatic mass plantings to container gardens, daylilies adapt to virtually any landscape style and space.
These dependable perennials thrive for decades with basic care – regular watering, annual fertilization, and occasional division. Their affordability and easy propagation mean your initial investment multiplies quickly as plants expand and divide.
Start small with 3 – 5 varieties in colors you love. As your plants mature and your confidence grows, expand your beds or share divisions with fellow gardeners.
Continue exploring our comprehensive landscape guides to transform your entire outdoor space. Discover expert tips on planting, garden design, soil preparation techniques, and creative landscaping ideas that will help you create the garden of your dreams.
Frequently asked questions (FAQs)
How many years do daylilies last in a flower bed?
With proper care and division every 3 – 5 years, daylilies can thrive for decades. These long-lived perennials represent a lasting landscape investment, often being passed down through generations by dividing and sharing plants.
Do daylilies spread or take over a garden?
Daylilies form gradually expanding clumps but are not invasive. They stay where planted and are easily managed by dividing every 3 – 5 years. Unlike aggressive spreaders, daylilies maintain their designated spaces predictably.
What month is best to plant daylilies?
Spring (March-May) and early fall (late August-October) are ideal planting times, allowing roots to establish before extreme weather. Spring planting gives a full growing season, while fall planting works especially well in zones 6 – 9.
Do daylilies bloom all summer?
Most varieties bloom for 3 – 4 weeks during their designated season. However, reblooming varieties like ‘Stella de Oro’ flower multiple times throughout summer. By combining early, midseason, and reblooming types, you can achieve continuous color from late May through September.
Can daylilies grow in pots or small gardens?
Yes, dwarf varieties thrive in containers at least 12 – 14 inches in diameter with drainage holes. Compact cultivars like ‘Stella de Oro’ (12 inches tall) and ‘Pardon Me’ (18 inches) stay proportionate in pots while delivering abundant blooms. Container plants require more frequent watering than ground-planted specimens.
