Nothing ruins the beauty of a carefully planted flower bed quite like aggressive weeds stealing nutrients, water, and attention from your prized blooms. If you’ve spent hours pulling weeds only to see them return within days, you’re not alone, and there’s a better way.
Learning how to kill weeds in flower beds effectively requires understanding multiple approaches, from fast-acting herbicides to gentle natural solutions and prevention strategies that stop weeds before they start. The right method depends on your weed type, flower varieties, and personal preferences regarding chemicals.
In this comprehensive guide, you’ll discover 8 proven weed-killing methods, timing strategies for maximum effectiveness, and professional techniques that save you hours of backbreaking work. Whether you prefer organic solutions or powerful herbicides, you’ll find actionable steps to reclaim your flower beds and keep weeds out of flower beds for your wonderful outdoor living space.
Understanding weeds in flower beds (why they’re so persistent)
Before jumping into solutions, understanding why weeds thrive in your flower beds helps you choose the most effective control strategies
Common weed types you’ll encounter
- Grassy weeds like crabgrass, foxtail, and goosegrass have narrow, blade-like leaves and fibrous root systems. They spread quickly through your flower beds and compete aggressively for water and nutrients.
- Broadleaf weeds include dandelions, chickweed, clover, and ground ivy. These typically have wider leaves and can be either annual (living one season) or perennial (returning year after year).
The distinction between annual and perennial weeds matters tremendously for treatment choice. Annual weeds complete their entire lifecycle in one season but produce thousands of seeds. Perennial weeds like bindweed, nutsedge, and thistle develop extensive root systems that allow them to return year after year, making them particularly challenging to eliminate.
Why weeds love your flower beds
Your flower beds create perfect conditions for weed growth. The disturbed, nutrient-rich soil you’ve carefully prepared for your flowers also benefits weeds. Gaps between plants allow sunlight to reach the soil surface, triggering weed seed germination.
Here’s something most gardeners don’t realize: your soil contains thousands of dormant weed seeds per square foot, known as the weed seedbank. These seeds can remain viable for decades, with some lasting 40 years or longer. Each time you cultivate or disturb the soil, you bring fresh seeds to the surface where they can germinate.
Regular watering benefits weeds just as much as your flowers. When you add fertilizer to boost your blooms, weeds take advantage of those nutrients too.
The true cost of ignoring weeds
Leaving weeds unchecked creates cascading problems beyond aesthetics. Weeds compete directly with your flowers for essential nutrients and water, weakening your prized plants over time. One mature weed can produce anywhere from 10,000 to 250,000 seeds, spreading the problem throughout your garden and into neighboring areas.
Weeds also harbor pests and diseases that can transfer to your flowers. Eventually, aggressive weeds can overtake and kill desirable plants entirely, forcing you to start over with expensive replacements.
Method 1: Hand pulling weeds (the chemical-free classic)
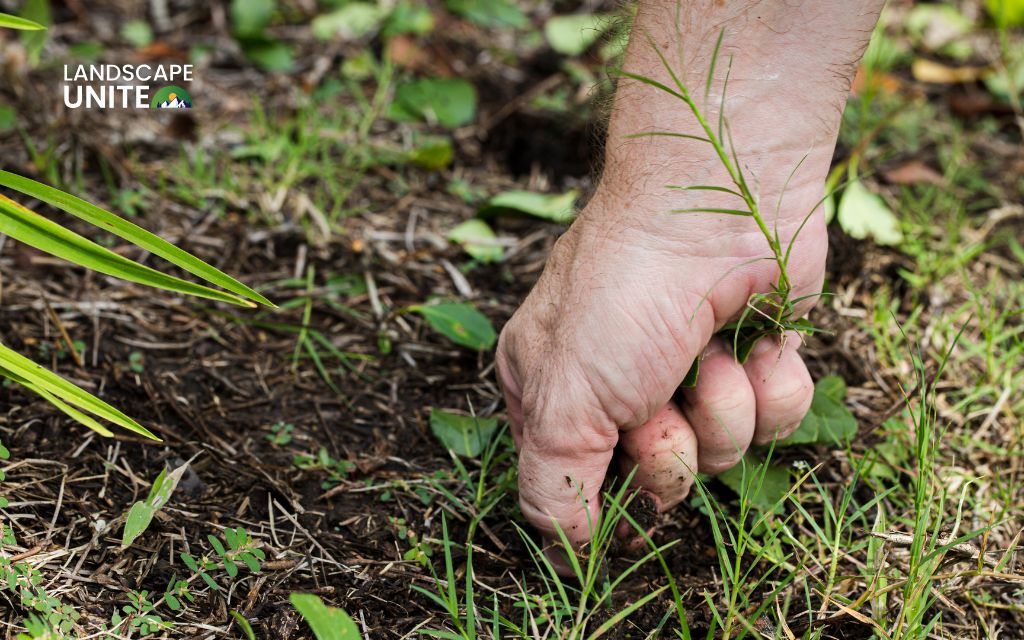
Hand pulling remains the most straightforward approach to killing weeds in flower beds, especially if you’re committed to chemical-free gardening.
When hand pulling works best
This method excels for small weed populations, annual weeds with shallow roots, and situations where you need precision around sensitive or newly planted flowers. Hand pulling is most effective when the soil is moist, as roots release more easily from damp earth.
Organic gardens and chemical-free zones rely primarily on hand weeding, making this skill essential for eco-conscious gardeners.
Step-by-step hand weeding technique
Water your flower bed thoroughly one to two hours before weeding. This softens the soil and makes root extraction much easier.
Grasp each weed at the base near the soil line rather than pulling from the top. Pull slowly and steadily in an upward motion to remove the entire root system. Jerking quickly often breaks the stem, leaving roots behind to regrow.
For tap-rooted weeds like dandelions, use a hand weeder tool to loosen and extract the deep root. Dispose of pulled weeds immediately, especially before they develop seeds. Apply fresh mulch to any bare spots you’ve created to prevent new weed germination.
Best tools for hand weeding
Investing in proper tools makes hand weeding significantly easier. A CobraHead or Nejiri Gama hand weeder helps you dig out stubborn tap roots. A stirrup hoe efficiently removes surface weeds with a push-pull motion.
Stand-up weed pullers like Grampa’s Weeder save your back by letting you extract weeds while standing upright. Garden kneelers or knee pads provide comfort during extended weeding sessions.
Pros and cons
Hand pulling offers immediate results with zero risk of damaging your flowers. It’s completely free and environmentally friendly.
However, this method is time-consuming and labor-intensive. Weeds return quickly from the seedbank, requiring constant vigilance. The physical demands can be backbreaking, especially for large flower beds or mature weeds with extensive root systems.
Method 2: Pre-emergent herbicides (stop weeds before they start)
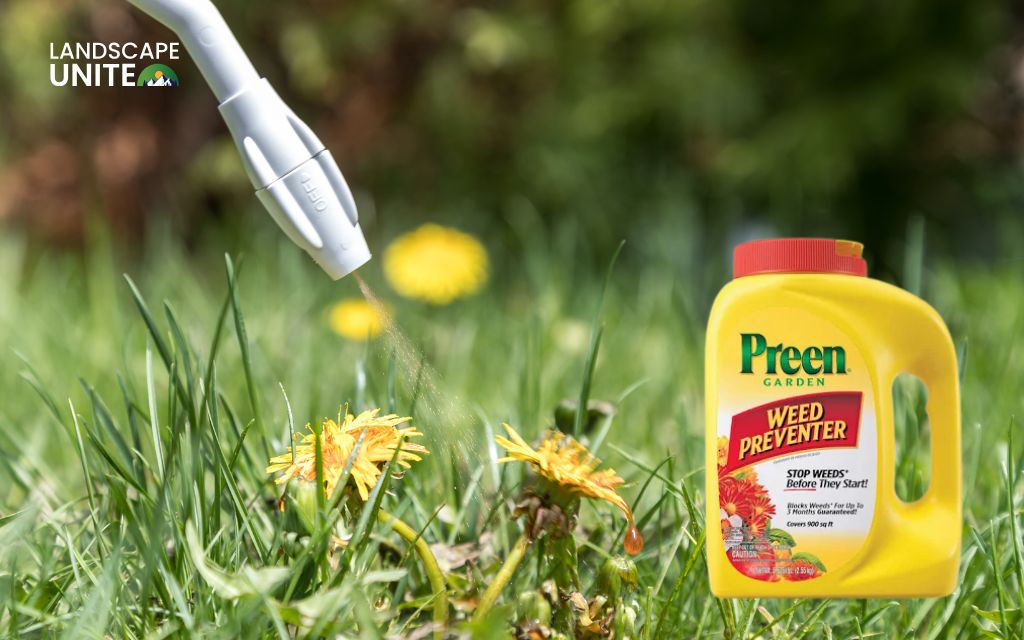
Pre-emergent herbicides represent one of the most effective strategies for flower bed weed control, yet many homeowners don’t understand how they work or when to apply them.
How pre-emergents work
These products create a chemical barrier in the top layer of soil that prevents weed seeds from germinating. Think of it as an invisible shield that stops weeds before they ever emerge.
Pre-emergents don’t kill existing weeds or harm established plants with roots below the barrier. Products like Preen, Snapshot, Barricade, and those containing isoxaben or trifluralin provide protection lasting six to twelve weeks depending on the formulation.
Critical timing for success
Timing makes or breaks pre-emergent success. You must apply before weed seeds germinate, and there are no second chances once weeds emerge.
For spring application, apply before soil temperatures reach 55°F consistently. A simple visual cue is when forsythia blooms finish. This typically occurs in early to mid-spring depending on your climate zone.
Fall application targets winter annual weeds. Apply when soil temperatures drop below 70°F, usually in late August through September.
Using soil temperature monitoring tools for your region ensures precise timing. The GreenCast soil temperature map provides real-time data to guide your applications.
Application instructions
Remove all existing weeds before applying pre-emergent, as these products only prevent germination and won’t kill live weeds. Apply granular or liquid products according to label rates, distributing evenly across your flower bed.
Water within seven days after application to activate the barrier. This step is critical for effectiveness. Avoid disturbing the soil after application, as cultivation breaks the chemical barrier and allows weed germination.
Reapply every six to twelve weeks throughout the growing season for continuous control.
What won’t be harmed
Pre-emergents are safe for established perennials and shrubs because their roots grow below the barrier layer. Transplanted flowers from containers can be planted immediately, as their root systems are already developed.
Your existing flower roots remain completely unaffected by the surface barrier.
Important warnings
Do not use pre-emergents if you plan to plant seeds directly in the bed. These products prevent all seed germination, including flowers you want to grow. Check product labels for waiting periods before planting after application.
Avoid using pre-emergents in beds where you’re reseeding perennials or frequently disturbing the soil.
Pros and cons
Pre-emergents prevent 85 to 95 percent of weeds, saving countless hours of manual weeding. They provide safe, effective control around established flowers and represent excellent value for the time saved.
The downsides include critical timing requirements and the need for reapplication. These products prevent desired seeds from germinating along with weeds. You’re also introducing chemicals into your garden, which some gardeners prefer to avoid.
Method 3: Post-emergent herbicides (kill existing weeds fast)
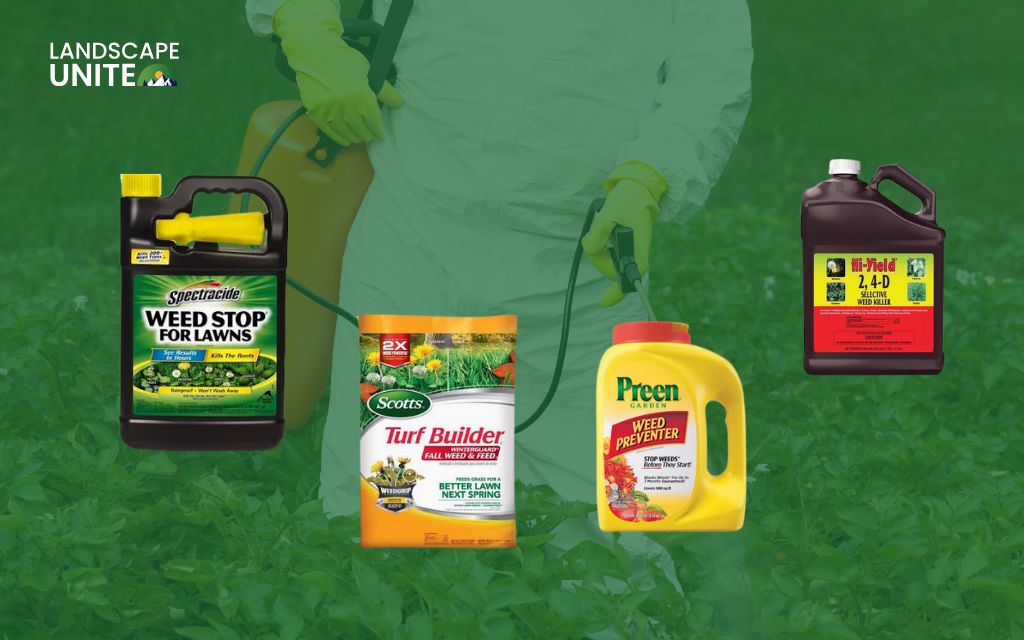
When weeds have already emerged in your flower beds, post-emergent herbicides offer fast, effective control if used correctly.
Understanding post-emergent types
Non-selective herbicides kill everything they touch. Glyphosate, sold as Roundup and other brands, is the most common non-selective herbicide. These products require extremely careful spot application to avoid damaging your flowers. The benefit is that glyphosate works systemically, traveling through the plant to kill roots completely.
Selective herbicides represent a game-changing option most homeowners don’t know exists. Grass-selective herbicides like Sethoxydim and Fusilade II kill only grasses without harming broadleaf flowers. This means you can spray directly over your flowers to eliminate grass invaders.
Broadleaf-selective herbicides like 2,4-D kill only broadleaf weeds. Use these cautiously near sensitive flowers, but they work wonderfully in mixed plantings.
How to spot-treat with glyphosate safely
Choose a calm day with no wind to prevent drift onto your flowers. Use a small spray bottle or foam brush for precision application rather than a large sprayer.
Apply directly to weed foliage only, carefully avoiding any contact with flower leaves or stems. If weeds grow very close to desirable plants, shield your flowers with cardboard during application.
Wait seven to fourteen days for complete kill as the herbicide translocates to the roots. Stubborn perennial weeds may require a second application after regrowth appears.
When to use selective herbicides
If grass is invading your flower beds, grass-selective herbicides provide the safest, most effective solution. You can literally spray over the top of your flowers without damage, killing only the grass.
For mixed broadleaf and grass weed problems, you’ll need a combination approach using different selective herbicides or careful spot treatment with non-selective products.
Always read product labels to confirm compatibility with your specific flower varieties.
Application best practices
Apply post-emergent herbicides when weeds are actively growing for best uptake. Morning application when plants are dry but before heat stress sets in works well.
Temperatures between 60°F and 85°F provide ideal conditions. Follow label rates exactly, as using more product doesn’t improve results and wastes money.
Don’t mow or disturb treated weeds for 48 hours after application to allow complete absorption.
Pros and cons
Post-emergent herbicides deliver fast results within seven to fourteen days and kill roots systemically for permanent control. They handle tough perennial weeds that resist hand pulling.
However, you’re using chemicals in your garden, and there’s always risk of accidental flower damage if you’re not careful. Dead weeds remain visible temporarily until you remove them.
Method 4: Natural weed killers (organic options)
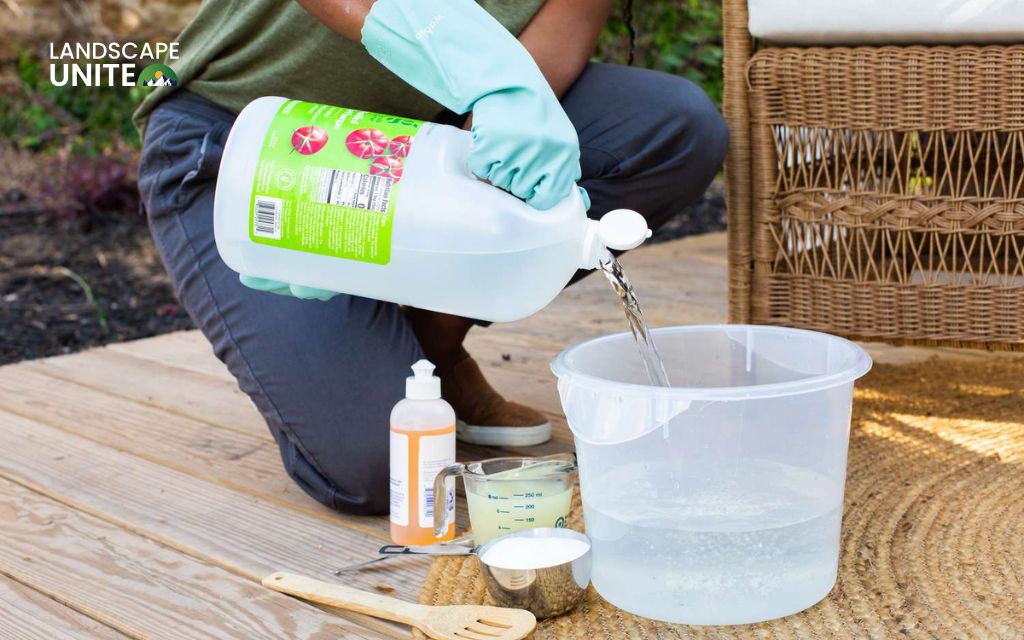
If you prefer keeping chemicals out of your garden, several natural alternatives kill weeds in flower beds with varying degrees of effectiveness.
Vinegar-based weed killer (with realistic expectations)
Vinegar-based weed killers are popular, but you need realistic expectations about their effectiveness.
- Light formula: Mix one gallon of white vinegar (5 percent acetic acid) with one tablespoon of dish soap.
- Stronger formula: Mix one gallon of horticultural vinegar (20 to 30 percent acetic acid) with one cup of salt and one tablespoon of dish soap.
Here’s the truth about vinegar that most garden blogs won’t tell you: household vinegar at 5 percent acetic acid burns only the top growth. It acts as a contact herbicide rather than a systemic one, meaning roots usually survive and weeds regrow.
Horticultural vinegar at 20 percent or higher proves more effective but is corrosive acid requiring protective equipment. The higher concentration can damage skin and eyes.
Adding salt provides better root kill but permanently damages soil structure. Salt persists indefinitely and can kill flowers months or years later. Use salt only in areas you’ll never plant again, like cracks in pavement.
Dish soap breaks surface tension to help the solution stick to leaves but provides minimal killing benefit on its own.
Application instructions
Spray vinegar solutions on sunny, hot days for best results. The heat accelerates the burning action. Saturate weed foliage completely while carefully avoiding any contact with flower leaves.
Expect to see results within 24 to 48 hours as top growth burns and wilts. Root kill often requires multiple applications, especially with household-strength vinegar.
Boiling water method
Pouring boiling water directly on weeds provides instant kill by bursting plant cells. This works wonderfully for weeds growing in cracks or along bed edges where you can pour accurately.
Boiling water leaves no soil residue and poses no chemical concerns. However, it’s impractical for large areas and works best on annual weeds with shallow roots.
Landscape torch and flame weeding
Propane torches briefly passed over weeds wilt plants by bursting cell walls. You don’t need to burn weeds to ash, just heat them until they wilt.
This method works best for pathways and bed edges. Keep flames away from dry mulch and never use near desirable plants.
Corn gluten meal (natural pre-emergent)
Corn gluten meal prevents seed germination naturally and provides a bonus 9 to 10 percent nitrogen fertilization. Apply at heavy rates of 20 pounds per 1,000 square feet.
This natural pre-emergent is less effective than synthetic options, providing 60 to 80 percent control versus 90 percent plus. The cumulative effect improves over two to three years of consistent use.
Pros and cons of natural methods
Natural weed killers are non-toxic to pets and children, environmentally friendly, and use readily available ingredients. They appeal to organic gardening philosophy.
The disadvantages include reduced effectiveness compared to synthetic herbicides and the need for repeated applications. These methods require more labor and time investment. Salt-based formulas can permanently damage soil, defeating the purpose of choosing natural options.
Method 5: Mulching for weed suppression (prevention powerhouse)
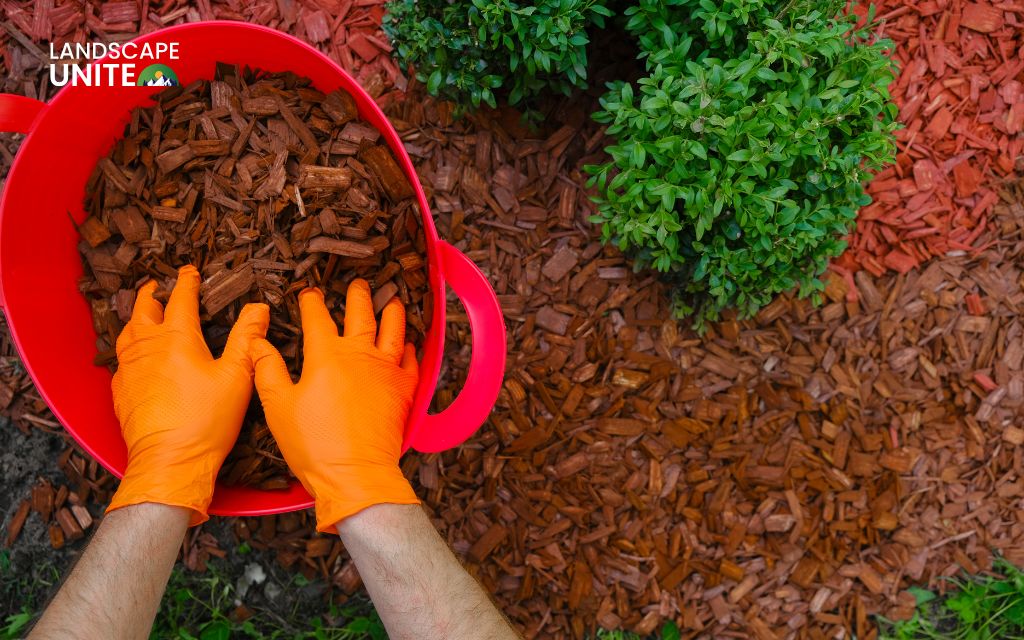
Proper mulching represents one of the most effective strategies for keeping weeds out of flower beds while simultaneously improving your garden’s appearance and soil health.
How mulch prevents weeds
Mulch blocks the sunlight that weed seeds need to germinate. Even weed seeds present in the soil struggle to emerge through a proper mulch layer.
The physical barrier mulch creates stops airborne seeds from reaching the soil surface. Organic mulches break down over time, improving soil structure and fertility. Mulch also maintains consistent soil moisture and temperature, creating ideal conditions for your flowers while suppressing weeds.
Best mulch types for flower beds
Organic mulches break down to enrich your soil:
Shredded hardwood bark offers attractive appearance and general-purpose use with a two-year lifespan. Cedar and cypress mulch provide natural insect repellent properties, last longer than hardwood, and benefit acid-loving plants.
Pine straw works beautifully in gardens, providing neat appearance and easy spreading. Pine bark nuggets offer decorative appeal, resist washing away on slopes, and decompose slowly.
Shredded leaves are free if you have trees, serve as excellent soil conditioners, but may need refreshing more frequently. Compost provides rich nutrients but decomposes quickly and works best with a topper mulch for longer-lasting weed control.
Inorganic options like river rock and pea gravel last permanently but heat the soil and provide no organic benefit. Use these primarily for pathways rather than around living plants.
Proper mulch application
Remove all existing weeds completely before mulching. Edge your beds for clean, defined lines that prevent grass encroachment.
Apply mulch two to three inches deep across the entire bed. This depth provides optimal weed suppression without suffocating plant roots. Less than two inches allows light penetration, letting weeds germinate. More than four inches creates anaerobic conditions, suffocates roots, and creates habitat for slugs and other pests.
Keep mulch two to three inches away from plant stems and tree trunks to prevent rot and disease. Never create “mulch volcanoes” piled high around plant bases, as this invites problems.
Refresh mulch annually as it decomposes, maintaining the proper depth for continued weed suppression.
Mulch depth science
The science behind mulch depth is precise. Less than two inches allows enough light penetration for weed seed germination, making your effort largely wasted. The optimal range of two to three inches provides excellent suppression while maintaining proper root health and soil biology.
More than four inches creates problems including anaerobic soil conditions, root suffocation, and excessive moisture retention that promotes disease. The “more is better” approach backfires with mulch.
Pros and cons
Mulch dramatically improves landscape appearance while reducing weeding by 70 percent or more. It enhances soil as it decomposes and helps retain moisture, reducing watering needs.
The downsides include annual replacement costs as organic mulch breaks down. Fresh wood mulch temporarily ties up soil nitrogen as it decomposes, though you can compensate with additional fertilizer. Mulch doesn’t kill existing weeds, so you must clear them first.
Method 6: Landscape fabric and weed barriers (the controversial choice)
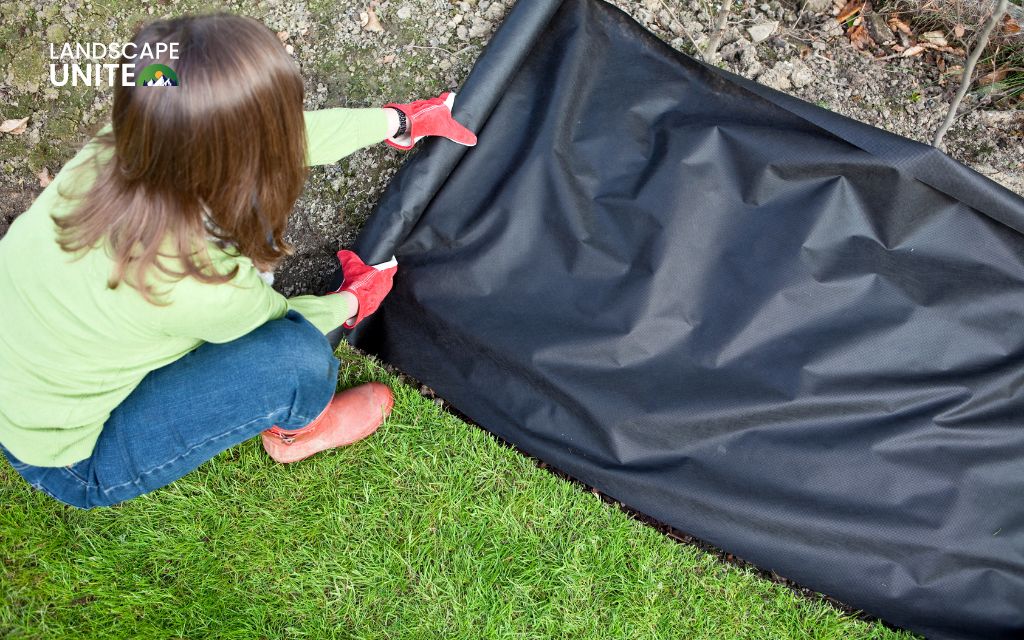
Landscape fabric seems like a logical solution for flower bed weed control, but the reality rarely matches the marketing promises.
How weed barriers are supposed to work
Landscape fabric is permeable material that theoretically blocks weed growth while allowing water and air to pass through. You cover the fabric with mulch for appearance and expect permanent weed control without chemicals or labor.
That’s the theory. Here’s what actually happens.
The reality after two to three years
The mulch you place on top of landscape fabric decomposes into new soil. Within two to three years, you’ve created a fresh soil layer on top of the fabric where weeds happily grow, often more vigorously than before.
The fabric blocks organic matter from reaching and enriching the soil below. This starves your flowers of natural nutrients and kills beneficial soil organisms including earthworms. Over time, your soil quality degrades significantly.
When you eventually want to remove the fabric or plant new flowers, you’ll discover it’s nearly impossible without damaging existing plants. The fabric tears, pieces remain embedded in the soil, and plant roots grow through it.
Professional landscapers avoid fabric in flower beds for these exact reasons. The short-term benefit isn’t worth the long-term problems.
Better alternatives
- Cardboard layer method: Overlap cardboard sheets under mulch as a biodegradable weed barrier. Cardboard suppresses weeds for six to twelve months while decomposing, then enriches the soil as it breaks down. You can easily cut holes for new plants, and it’s completely free if you source boxes from retailers.
- Thick mulch alone: Apply four inches of mulch initially, which settles to two to three inches. This provides excellent weed suppression without the problems of fabric.
- Newspaper layers: Use six to ten sheets of newspaper under mulch for a shorter-lasting but effective and biodegradable barrier.
When fabric is appropriate
Landscape fabric works well under permanent gravel pathways, in hardscapes, rock gardens, and non-planting areas. Never use it in flower beds with living plants that require healthy, living soil.
Pros and cons
Fabric provides good weed suppression for the first one to two years.
However, it damages long-term soil health, eventually allows weed growth on top, proves extremely difficult to remove, and harms essential soil biology. The initial investment of time and money creates more work and expense down the road.
Method 7: The stale seedbed technique (professional secret)
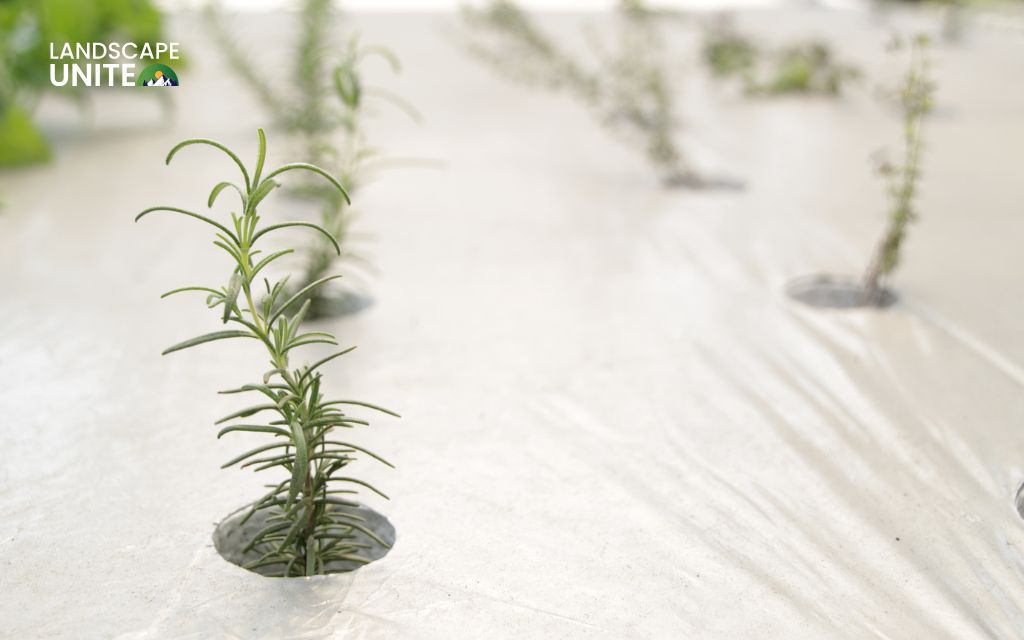
The stale seedbed technique remains one of the best-kept secrets in professional horticulture, rarely used by homeowners despite its remarkable effectiveness.
What is stale seedbed?
This method pre-germinates and kills the weed seedbank before planting your flowers. By triggering weed germination and eliminating seedlings before they mature, you deplete the surface seedbank and dramatically reduce season-long weeding by 60 to 80 percent.
Commercial growers rely on this technique routinely because it works so well. Home gardeners can achieve professional results with patience and planning.
Step-by-step process
Prepare your bed completely by removing old plants, tilling or turning the soil, and raking smooth. This initial disturbance brings dormant weed seeds to the surface.
Water thoroughly to trigger weed seed germination. Consistent moisture is critical for germination.
Wait ten to fourteen days for a flush of weed seedlings to emerge, growing one to two inches tall. This represents thousands of weeds that would have plagued you all season.
Kill the emerged seedlings using shallow cultivation with a hoe, flame weeding, or a quick herbicide spray. The key is killing them before they develop extensive roots or produce seeds.
Repeat this cycle two to three times. Each repetition depletes more of the surface seedbank.
Finally, plant your flowers with minimal soil disturbance to avoid bringing new seeds to the surface.
Timing considerations
Start the stale seedbed process six to eight weeks before your desired planting date. This works best for spring bed preparation, starting in March for May planting in most regions.
The process requires warm soil for weed germination, so timing depends on your climate.
Why this works so well
Stale seedbed eliminates thousands of weed seeds waiting to germinate, reducing your chemical and labor needs all season. You create near weed-free conditions through one-time intensive effort rather than continuous maintenance throughout the growing season.
The dramatic long-term weed reduction lets you enjoy your flowers rather than constantly fighting weeds.
Pros and cons
This method delivers dramatic long-term weed reduction with professional results for any flower bed. The upfront investment of time pays dividends all season.
The disadvantages include requiring advance planning and delaying planting by six to eight weeks. You need patience to complete multiple cycles rather than planting immediately.
Method 8: Cultural practices and smart design (long-term prevention)
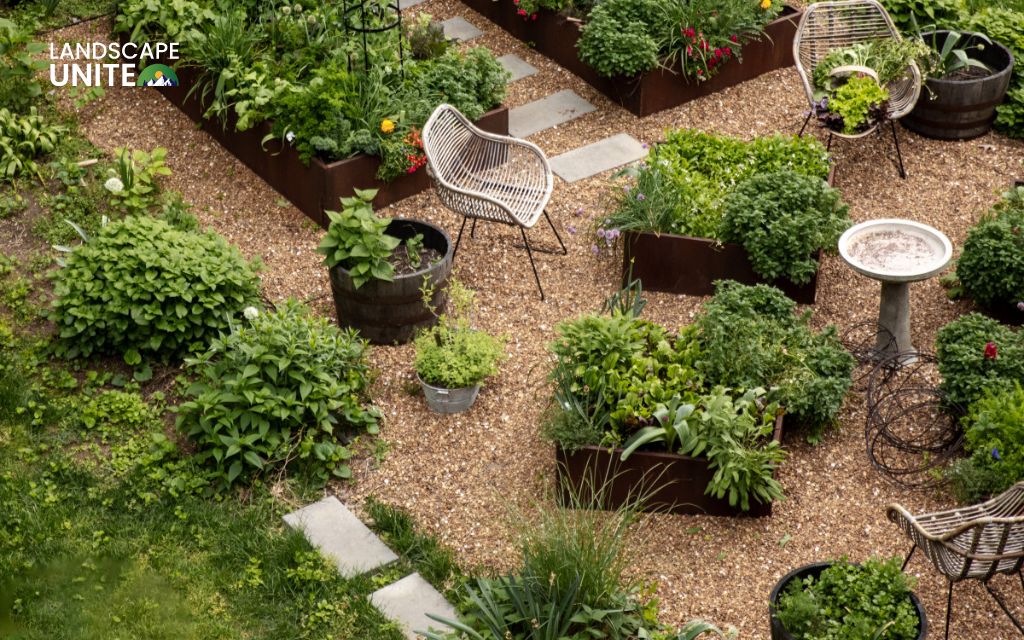
The most sustainable approach to flower bed weed control combines smart design principles that naturally suppress weeds while creating more beautiful, healthier gardens.
Dense planting to crowd out weeds
Space plants to fill in and shade the soil as they mature. Weeds struggle to compete without adequate sunlight. Use ground covers between larger plants to eliminate bare soil where weeds thrive.
Dense planting creates fuller, lusher appearance while naturally suppressing weed growth. The living mulch of plant foliage proves more effective than any artificial barrier.
Proper plant spacing
Balance airflow needs with weed suppression goals. Plant according to mature size rather than current container size. The gaps that seem appropriate for young plants often allow years of weed problems until flowers fill in.
Use annual flowers to fill gaps while perennials establish and grow to their full size. This provides immediate weed suppression and beauty.
Soil health for competitive plants
Healthy flowers outcompete weeds naturally through vigorous growth. Regular fertilization keeps plants strong and full. Compost additions improve soil structure and provide steady nutrition.
Adequate watering during establishment helps flowers develop robust root systems that compete effectively for resources.
Regular maintenance schedule
Implement a weekly fifteen-minute weed patrol to catch problems early. Young weeds are exponentially easier to pull than established ones with extensive root systems.
Remove weeds before they flower and produce seeds. One weeding session before seed production prevents thousands of future weeds. Inspect after rain when the soil is soft and pulling is easiest.
What your weeds tell you
Weeds serve as indicators of underlying soil conditions. Addressing these issues naturally reduces weed pressure.
- Dandelions indicate compacted, acidic soil. Aerate and apply lime to correct pH.
- Chickweed thrives in high nitrogen, fertile soil. This actually indicates good soil quality.
- Crabgrass suggests thin plant coverage and bare soil. Increase planting density.
- Moss grows in poor drainage, shade, and acidic conditions. Improve drainage and adjust pH.
- Clover indicates nitrogen deficiency. Add fertilizer to correct the imbalance.
Fixing these underlying conditions makes your soil less hospitable to specific weeds while creating better conditions for your flowers.
Choosing the right method for your situation
No single method works perfectly in every situation. Combine strategies based on your specific circumstances.
Decision matrix
- For new or renovated beds: Use stale seedbed technique plus pre-emergent application plus mulch for near-perfect weed control from the start.
- For established beds with light weeds: Hand pulling combined with mulch replenishment handles occasional weeds efficiently.
- For heavy weed infestations: Apply post-emergent herbicide to kill existing weeds, hand pull survivors, apply pre-emergent to prevent new germination, and maintain proper mulch depth.
- For organic gardens: Rely on hand pulling, thick mulch layers, cardboard barriers under mulch, and boiling water for spot treatment.
- For low-maintenance goals: Combine pre-emergent applications in spring and fall with proper mulching and dense planting for minimal ongoing effort.
- For grass in flower beds: Use grass-selective herbicide as the safest option, or careful glyphosate spot treatment if selective herbicides aren’t available.
Combining methods for best results
Layer prevention strategies by using both mulch and pre-emergent for maximum effectiveness. Respond quickly to any breakthrough weeds with immediate spot treatment before they establish and produce seeds.
Adopt a seasonal approach using different methods at different times throughout the year. Spring focuses on prevention, summer on quick response to emerged weeds, and fall on preparing for next season.
Timing your weed control efforts
Strategic timing multiplies the effectiveness of every weed control method.
Spring (March through May)
Apply pre-emergent in early spring before soil temperatures reach 55°F consistently. Remove any winter annual weeds that survived. Refresh mulch layers to proper depth. Consider implementing stale seedbed technique for new beds.
Summer (June through August)
Spot-treat emerged weeds quickly before they establish extensive roots. Maintain mulch depth as it settles and decomposes. Hand-pull after rains when soil is soft and roots release easily.
Apply a second pre-emergent application mid-summer if your product label allows, typically at the eight to ten week mark.
Fall (September through November)
Apply pre-emergent in late summer or early fall to prevent winter annual weeds like chickweed and henbit. Remove mature weeds before they produce and scatter seeds. Add fresh mulch before winter to suppress early spring germination.
Prepare beds for next spring by addressing soil issues and planning improvements.
Winter (December through February)
Remove winter weeds when soil is workable and weather permits. Plan your spring weed control strategy while reviewing what worked and didn’t work last season. Order supplies for spring applications before the rush.
Common mistakes to avoid
Learning from others’ mistakes saves time, money, and frustration with killing weeds in flower beds.
- Waiting until weeds are mature: Young weeds are exponentially easier to kill than established plants. Mature weeds produce thousands of seeds that perpetuate problems for years. Larger root systems resist removal and often break, leaving viable roots to regrow.
- Using salt-based weed killers near flowers: Salt persists in soil indefinitely and can kill flowers months or years after application. It damages soil structure permanently and harms beneficial microorganisms.
- Applying pre-emergent too late: Once weed seeds germinate, pre-emergent opportunity is lost. You’ve wasted product and money, and must wait until next season for proper application.
- Disturbing soil after pre-emergent application: Cultivation breaks the chemical barrier and brings new seeds to the germination zone, defeating the entire purpose of pre-emergent use.
- Installing landscape fabric in flower beds: What seems like a permanent solution becomes a long-term problem. Use cardboard or newspaper alternatives instead.
- Using thin mulch layers: One inch of mulch does almost nothing for weed suppression. You need two to three inches for effective control.
- Leaving weed roots behind: Tap-rooted weeds like dandelions regrow from even small root fragments. Pull when soil is moist for complete removal and use appropriate tools to extract deep roots.
Safety considerations
Responsible weed control protects your family, pets, and environment while effectively managing weeds.
Using herbicides safely
Read and follow product label instructions exactly. Labels provide legal requirements, not suggestions. Wear appropriate protective equipment including gloves and eye protection during mixing and application.
Keep pets and children away from treated areas during application and for the drying period specified on the label. Store all products securely in original containers out of reach of children and pets.
Never mix different products unless the label specifically allows it. Dispose of empty containers according to local regulations and product label instructions.
Pet and child safety
Horticultural vinegar is corrosive acid that can burn skin and damage eyes. Keep children and pets away during application and until areas dry completely.
Glyphosate requires allowing treated areas to dry completely before access, typically two to four hours under good conditions.
Pre-emergent herbicides generally have low toxicity to mammals but still follow label precautions. Mark treated areas temporarily to remind family members of recent applications.
Environmental considerations
Avoid herbicide runoff into waterways, storm drains, and wetlands. Time applications when heavy rain isn’t forecast within 24 hours. Spot-treat individual weeds instead of broadcast applications whenever possible to minimize chemical use.
Consider beneficial insects and pollinators when choosing products and timing applications. Select the least-toxic effective option for your specific weed problem rather than defaulting to the strongest chemical.
FAQs about how to kill weeds in flower beds
Will vinegar and dish soap kill weeds without harming my flowers?
Vinegar burns plant tissue on contact but doesn’t discriminate between weeds and flowers. Any plant the solution touches will suffer damage. Household vinegar at 5 percent strength typically burns only top growth, and weeds often regrow from surviving roots. Stronger horticultural vinegar provides better results but is corrosive and dangerous to handle. Use vinegar solutions only for spot treatment on weeds in areas well away from your flowers. For persistent weeds and safer flower bed application, consider selective herbicides or careful hand pulling instead.
When is the best time to apply pre-emergent in flower beds?
Apply pre-emergent herbicide in early spring before soil temperatures consistently reach 55°F. A reliable visual cue is when forsythia blooms finish in your area. For year-round protection, make a second application in late summer when soil temperatures drop below 70°F, targeting winter annual weeds like chickweed. Timing is absolutely critical because pre-emergents only prevent germination and provide no control once weeds emerge. Using soil temperature monitoring tools for your specific region ensures optimal application timing for maximum effectiveness.
Can I use a weed killer that doesn’t kill plants like Roundup in flower beds?
You can use glyphosate products like Roundup in flower beds but only with extremely careful spot treatment. Glyphosate is non-selective and kills any plant it contacts, including your prized flowers. Use a small spray bottle or foam brush to apply directly to weed foliage only. Shield nearby flowers with cardboard during application to prevent drift or accidental contact. Apply on calm days when wind won’t carry spray to desirable plants. Once the product dries in two to four hours, it binds to treated plants and won’t transfer. For safer options, consider grass-selective herbicides that kill only grasses while protecting broadleaf flowers, or use hand pulling around sensitive plants.
Does landscape fabric really prevent weeds in flower beds?
Landscape fabric initially suppresses weeds for one to two years but typically creates worse problems long-term. Mulch placed on top decomposes into new soil where weeds grow prolifically, often more than before fabric installation. The fabric blocks organic matter from enriching soil below, degrading soil health and killing beneficial organisms. Removal becomes nearly impossible without damaging plant roots. Professional landscapers rarely use fabric in flower beds for these reasons. Better alternatives include biodegradable cardboard layers under mulch that suppress weeds while improving soil as they decompose, or simply maintaining proper mulch depth without any barrier.
What’s the best mulch for preventing weeds in flower beds?
Shredded hardwood bark or cedar mulch applied two to three inches deep provides excellent weed suppression while improving soil as it breaks down. Pine straw works beautifully in warmer climates and around acid-loving plants. The critical factor is depth rather than mulch type. Less than two inches allows light penetration and weed germination, while more than four inches suffocates plant roots and creates problems. Refresh organic mulch annually to maintain proper depth and keep it two to three inches away from plant stems to prevent rot. Proper mulching reduces weeding needs by 70 percent or more while enhancing your garden’s appearance.
Reclaim your beautiful flower beds
The journey to learn how to kill weeds in flower beds leads to one essential realization: effective weed control combines multiple strategies rather than relying on any single solution. Whether you choose the immediate satisfaction of hand pulling, the prevention power of pre-emergents, the fast action of herbicides, or the natural sustainability of thick mulch, taking action before weeds establish deep roots makes all the difference.
Start with methods matching your gardening philosophy and comfort level, then combine approaches for maximum results. Spring pre-emergent application paired with proper mulching eliminates 90 percent of weeding effort, freeing you to enjoy stunning flower displays rather than battling constant invasions.
Your flower beds deserve to showcase carefully selected blooms instead of competing with unwanted weeds. Assess your current situation today and implement the strategies fitting your specific needs. Beautiful flower beds free from aggressive weeds are absolutely achievable through the right knowledge and consistent seasonal effort.
Landscape Unite provides trusted gardening wisdom and landscape inspiration to help you create outdoor spaces you’ll love. Take the next step by exploring our comprehensive guides on seasonal planting, soil health improvement, and garden design principles. Contact Landscape Unite for expert tips and discover fresh posts covering everything from flower selection to complete landscape transformations that turn ordinary yards into extraordinary gardens.
